How to Create a Website with Hostinger: A Comprehensive Guide
Hostinger is known for its user-friendly hPanel (their custom control panel), affordable hosting plans, and integrated website building tools, making it an excellent platform for anyone looking to get online.
Step 1: Define Your Website’s Purpose
Before diving into the technical steps, take a moment to plan your website. This initial planning helps streamline the entire process.
- What is your website’s primary goal? (e.g., personal blog, online store, portfolio, business site, informational hub).
- Who is your target audience?
- What kind of content will you feature? (e.g., text, images, videos, product listings, contact forms).
- What essential pages do you need? (e.g., Home, About Us, Services/Products, Contact, Blog).
Having a clear vision will guide your choices for domain name, design, and features.
Step 2: Choose and Register Your Domain Name
Your domain name is your website’s unique address on the internet (example:hosterdream.com). It’s crucial for branding and accessibility.
- Visit Hostinger’s Website: Open your web browser and go to Hostinger’s official website HERE. You’ll usually land on a page highlighting their hosting plans or a special offer
- Locate the Domain Checker: Scroll down or look in the navigation menu for a “Domains” or “Domain Checker” section. There’s typically a large search bar designed for this purpose on the homepage or a dedicated domain page.
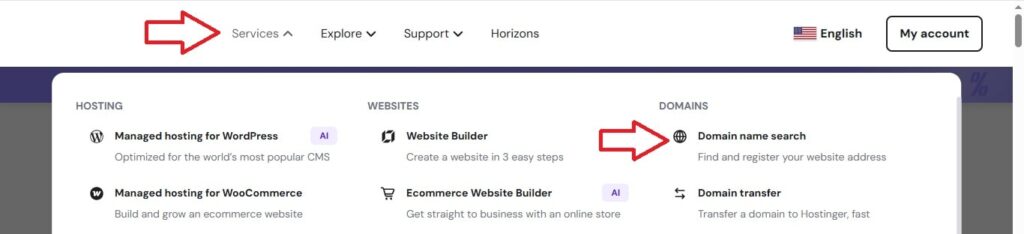
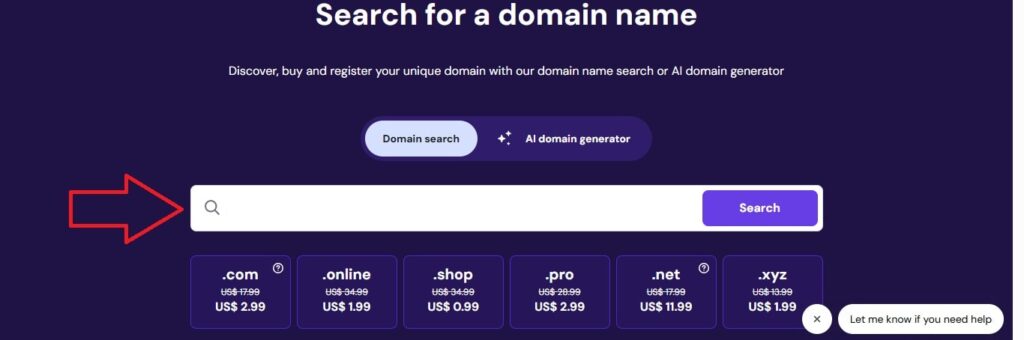
- What you’ll see: An input field, usually with placeholder text such as “Enter your desired domain name” or “Find your perfect domain.”
- Search for Your Domain: Type in your desired domain name (e.g.,
myamazingblog) and select your preferred Top-Level Domain (TLD), like.com,.net, or.org. Click the “Search” or “Check Availability” button.
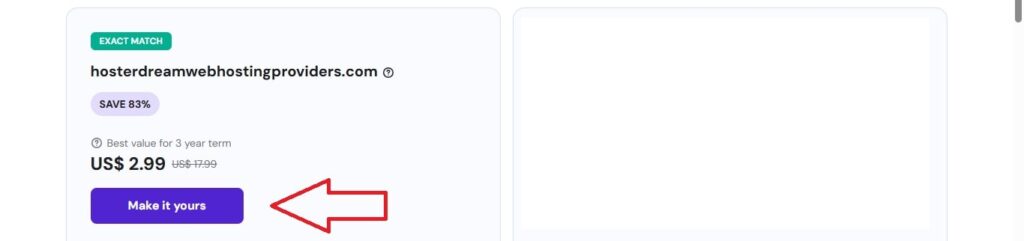
- What you’ll see: A list of search results indicating if your chosen domain is available. If it is, it’ll often show “Available!” and options to add it to your cart. If not, it will suggest similar available names or different TLDs.
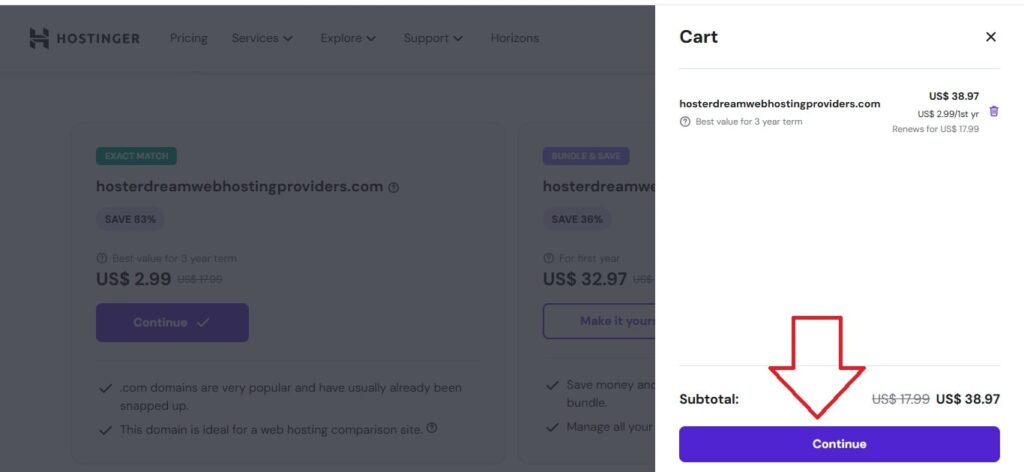
- Add Domain to Cart: Once you find an available domain you like, click the “Add to Cart” button next to it. Many Hostinger hosting plans include a free domain registration for the first year. This will be indicated during the selection process.
- What you’ll see: A confirmation that the domain has been added to your cart, possibly with a note about a free domain if applicable, and a prompt to “Continue” or “Choose Hosting.”
Step 3: Select Your Web Hosting Plan
Web hosting is the service that stores your website’s files and makes them accessible to users worldwide.
- Navigate to Hosting Plans: After selecting your domain, you’ll likely be prompted to choose a hosting plan. If not, go to the “Hosting” section in Hostinger’s main navigation and select “Web Hosting” or “WordPress Hosting.”
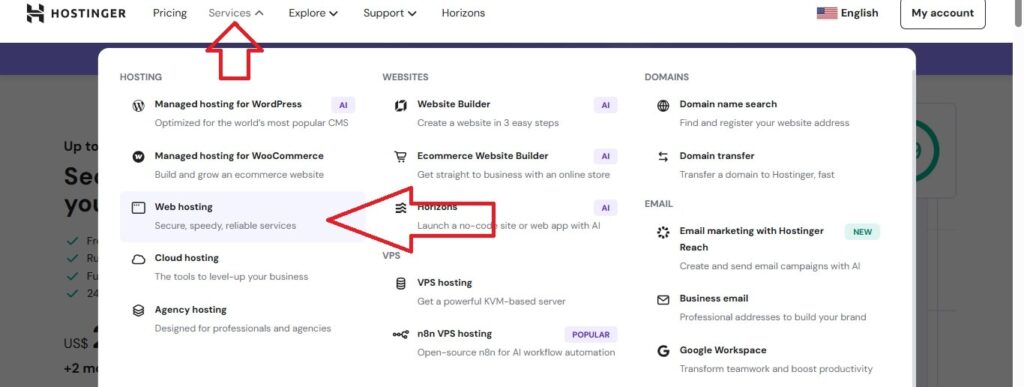
- What you’ll see: A comparison table of different hosting plans (e.g., Single, Premium, Business Shared Hosting, WordPress Hosting, Cloud Hosting). Each plan will list its features (disk space, number of websites, bandwidth, free SSL, email accounts) and pricing.
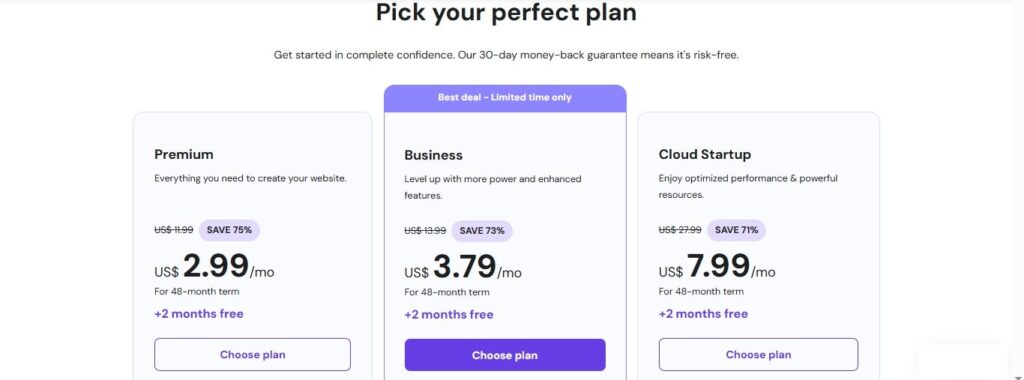
- Choose a Suitable Plan:
- For beginners and small websites/blogs, Premium Shared Hosting is highly recommended. It offers a good balance of features, performance, and affordability, often including a free domain and unlimited websites.
- For growing businesses or those expecting higher traffic, Business Shared Hosting provides more resources and daily backups.
- If you specifically plan to use WordPress, their WordPress Hosting plans are optimized for it.
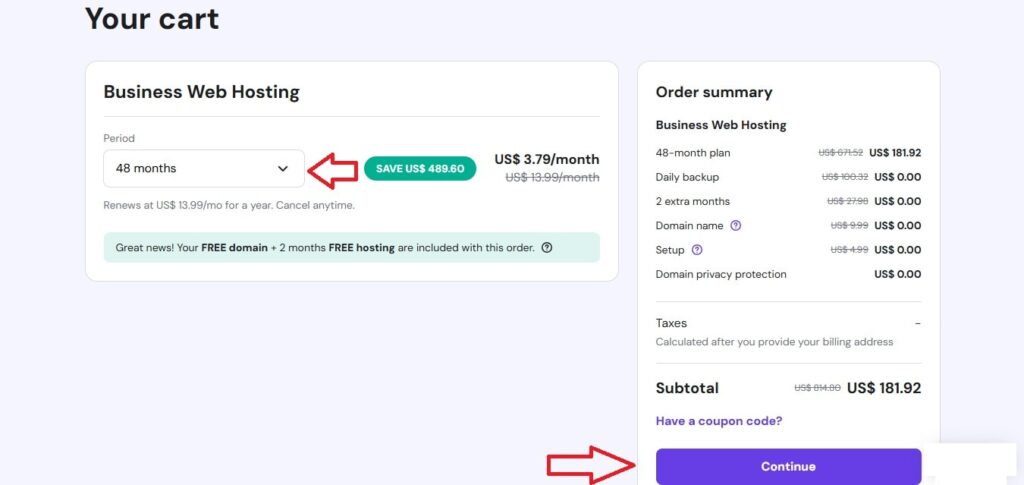
- Select a Billing Period: Hostinger typically offers significant discounts for longer subscription periods (e.g., 12, 24, or 48 months). Choose the period that best suits your budget and long-term plans.
- What you’ll see: Radio buttons or a dropdown to select the duration of your hosting plan, with the corresponding monthly price displayed.
- Add to Cart: Click “Add to Cart” for your chosen hosting plan.
Step 4: Complete Registration and Initial Setup of your Website
This step involves creating your account, making the payment, and performing the essential initial setup.
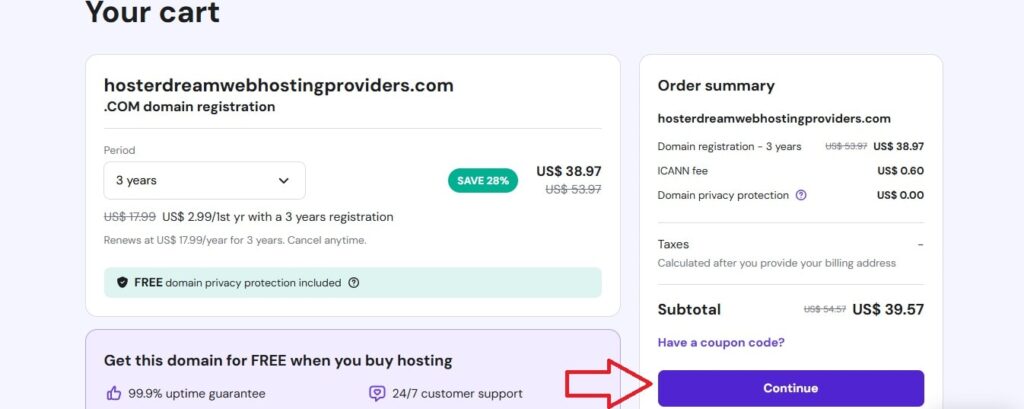
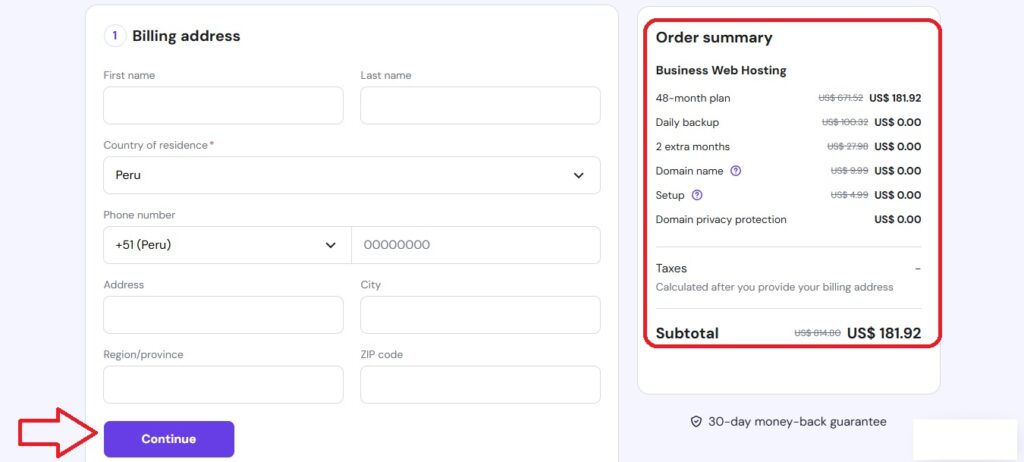
- Review Cart and Checkout: You’ll be directed to a checkout page where you can review your selected domain and hosting plan.
- What you’ll see: A summary of your order, including the domain name, hosting plan, any add-ons (like Domain Privacy), and the total cost.
- Create Your Account: Provide your email address or use a social media account (Google, Facebook) to create your Hostinger account.
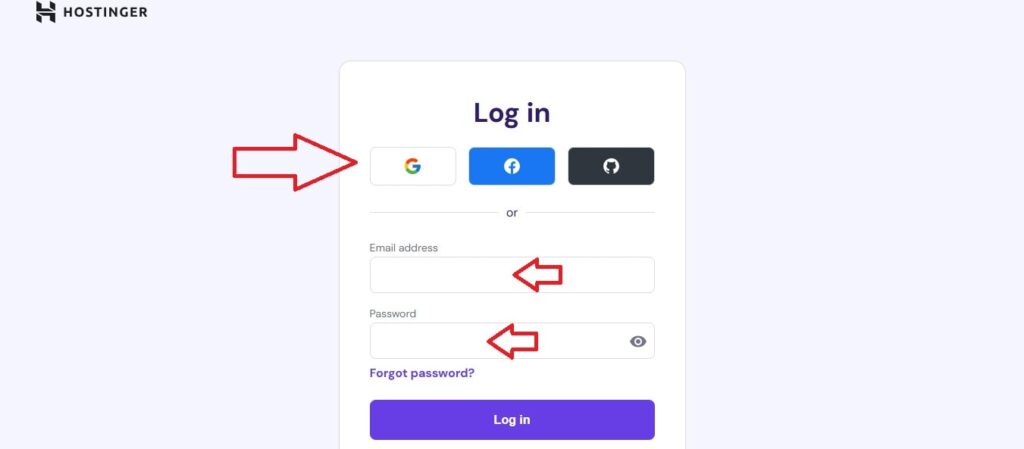
- What you’ll see: Fields for email and password, or buttons for “Sign up with Google/Facebook.”
- Select Payment Method: Choose your preferred payment method from the available options (credit card, PayPal, Google Pay, cryptocurrencies, etc.).
- What you’ll see: A list of payment icons/options and fields to enter your payment details securely.
- Process Payment: Complete your purchase. You’ll receive an order confirmation email shortly.
- Start Setup Wizard: After payment, Hostinger will automatically launch a setup wizard to guide you through the initial configuration.
- What you’ll see: A sequence of screens with questions like “Who are you creating the website for?” “What kind of website will it be?” “Choose a platform to build your website.”
- Link Domain and Server Location:
- The wizard will ask you to select your domain (the one you just registered or an existing one).
- You’ll also choose a server location. Pick the data center geographically closest to your target audience for optimal website speed.
- What you’ll see: Dropdown menus or lists for selecting your domain and server location.
- Choose Website Creation Method: Hostinger will ask if you want to Install WordPress or use their Hostinger Website Builder.
- What you’s see: Two distinct options, often with icons or brief descriptions, like “WordPress” and “Hostinger Website Builder (with AI tools).”
- Complete Setup: Follow the remaining prompts, which might include setting up initial WordPress login details if you chose WordPress.
- What you’ll see: A “Finish Setup” or “Submit” button at the end of the wizard.
- Domain Verification (Crucial!): Keep an eye on your email inbox (including spam/junk folders) for a domain verification email from Hostinger or ICANN. You must click the verification link in this email to activate your domain. If you miss this, your domain may be suspended.
- What you’ll see: An email with a subject line like “Action Required: Verify Your Domain Name” or similar, containing a link to click.
- Access hPanel: Once the setup is complete and your domain is verified, you’ll be able to access your hPanel, Hostinger’s intuitive custom control panel.
- What you’ll see: Your hPanel dashboard, featuring various sections like “Websites,” “Domains,” “Emails,” and “Files” in a sidebar or as large icons.
Step 5: Build Your Website
Now comes the exciting part: creating your website’s actual content and design. You have two main routes with Hostinger:
Option A: Using Hostinger Website Builder (Recommended for Beginners/No Codes or Skill Needed)
Hostinger’s AI-powered Website Builder is a drag-and-drop tool that requires no coding.
- Launch the Builder: From your hPanel dashboard, navigate to the “Websites” section. You should see your newly set up website listed. Click “Edit Website” next to it, which will open the Website Builder.
- What you’ll see: A button or link labeled “Edit Website” or “Manage Website” that takes you into the builder interface.
- Choose a Template or Use AI:
- Select a Template: Hostinger offers a wide range of professionally designed templates categorized by industry. Browse and choose one that aligns with your website’s purpose.
- Use AI Builder: If you select the AI option, you’ll be prompted to describe your website in a few sentences. The AI will then generate a preliminary website structure, content, and design for you.
- What you’ll see: A gallery of website templates, or an input field for the AI builder prompt, followed by AI-generated initial designs.
- Customize with Drag-and-Drop: Once you’re in the editor, you can easily customize every aspect of your site.
- Add/Edit Elements: Click on any text, image, or section to edit its content and properties. Drag and drop new elements (e.g., text blocks, images, buttons, forms, maps, social icons) from a sidebar menu onto your pages.
- What you’ll see: A visual representation of your website page. On the left or right, there will be a sidebar with sections like “Elements,” “Pages,” “Website Styles,” and “AI Tools.” You’ll see outlines or grid lines helping you align elements.
- Change Styles: Use the “Website Styles” or “Design” tab to modify fonts, colors, and global design settings to match your brand.
- Manage Pages: Add new pages (e.g., “About Us,” “Services,” “Contact”), rename existing ones, and organize your navigation menu.
- Utilize AI Tools: Explore AI tools for generating content, images, and even product descriptions (if building an e-commerce site).
- What you’ll see: Options within the sidebar or as floating toolbars when you select an element, allowing you to change text, upload images, link buttons, etc.
- Add Your Content: Replace all placeholder text and images with your unique content. Ensure your messaging is clear and engaging.
- Optimize for Mobile: The Hostinger Website Builder automatically makes your site responsive, but you can usually switch to a mobile preview mode to fine-tune the design for smaller screens.
- What you’ll see: An icon (often a desktop, tablet, and mobile phone icon) in the editor’s top bar to switch between device views.
Option B: Installing and Using WordPress (Popular for Blogs/Advanced Sites)
WordPress is a highly flexible Content Management System (CMS) popular for blogs, e-commerce stores (with WooCommerce), and complex sites.
- Install WordPress: From your hPanel dashboard, go to the “Websites” section and select “Auto Installer” or find the “WordPress” icon.
- What you’ll see: A list of applications to install, with WordPress usually being a prominent option. Click “Select” or “Install” next to WordPress.
- Configure WordPress Installation:
- You’ll be asked to provide details for your WordPress admin account: website title, admin email, username, and a strong password.
- Choose the latest WordPress version and your preferred language.
- What you’ll see: A form with fields for “Website Title,” “Admin Email,” “Username,” and “Password.” Below, options for “WordPress Version” and “Language.”
- Install: Click the “Install” button. Hostinger’s auto-installer will quickly set up WordPress on your domain.
- What you’ll see: A progress bar indicating installation, followed by a success message.
- Access WordPress Dashboard: Once installed, you can access your WordPress admin dashboard. The easiest way is to type
yourdomain.com/wp-admininto your browser, or you can often find a direct “Edit Website” or “WordPress Dashboard” button in your Hostinger hPanel under the “Websites” section.- What you’ll see: The WordPress login screen, followed by the WordPress dashboard – a backend interface with a left-hand navigation menu (e.g., “Posts,” “Pages,” “Appearance,” “Plugins,” “Settings”).
- Choose a Theme: In your WordPress dashboard, go to Appearance > Themes. You can browse thousands of free themes from the WordPress.org directory or upload a premium theme you’ve purchased.
- What you’ll see: A gallery of WordPress themes. You can click “Add New” to browse more.
- Install Plugins: Go to Plugins > Add New. Plugins extend WordPress functionality. Popular essential plugins include:
- Yoast SEO / Rank Math: For Search Engine Optimization.
- WPForms / Contact Form 7: For creating contact forms.
- LiteSpeed Cache: For website speed optimization (often pre-installed and optimized by Hostinger).
- Wordfence Security: For website security.
- WooCommerce: If you plan to build an online store.
- What you’ll see: A search bar to find plugins and “Install Now” buttons next to each plugin.
- Create Pages and Posts:
- Go to Pages > Add New for static content (e.g., About Us, Contact, Services).
- Go to Posts > Add New for blog articles.
- What you’ll see: The WordPress Block Editor (Gutenberg) or Classic Editor, where you can add text, images, headings, and other content.
- Customize: Use the Customizer (Appearance > Customize) to adjust your theme’s settings, header, footer, colors, and more.
Step 6: Review, Optimize, and Launch Your Website
Before making your site fully public, it’s essential to do a final check.
- Review and Test Thoroughly:
- Check all links: Ensure internal and external links work correctly.
- Proofread all content: Look for typos, grammatical errors, and clarity.
- Test forms: Submit any contact forms or sign-up forms to ensure they are working and you receive the submissions.
- Check responsiveness: View your website on various devices (desktop, tablet, mobile) to confirm it looks good and is functional on all screen sizes.
- What you’ll see: Your live website as a visitor would see it. Interact with every element.
- Activate SSL Certificate: Hostinger provides a free SSL certificate with most plans. This encrypts data, secures your site, and is vital for SEO. Hostinger usually activates this automatically, but you can confirm its status in your hPanel under “SSL.”
- What you’ll see: In hPanel, under the “SSL” section, you’ll see the status (e.g., “Active,” “Pending,” or an option to “Install”). Ensure it says “Active.” Your website URL should show
https://instead ofhttp://.
- What you’ll see: In hPanel, under the “SSL” section, you’ll see the status (e.g., “Active,” “Pending,” or an option to “Install”). Ensure it says “Active.” Your website URL should show
- Basic Search Engine Optimization (SEO):
- Descriptive Titles & Meta Descriptions: Ensure each page has a clear, concise title and a short description that tells search engines what the page is about.
- Image Alt Text: Add descriptive “alt text” to all your images. This helps search engines understand your images and improves accessibility.
- Clean URLs: Ensure your page URLs are short, descriptive, and contain relevant keywords.
- What you’ll see: In the Hostinger Website Builder, specific fields for SEO settings on each page. In WordPress, if you install an SEO plugin like Yoast SEO or Rank Math, you’ll see dedicated sections below your content editor for these fields.
- Launch Your Website:
- Hostinger Website Builder: Look for a prominent “Go Live” or “Publish” button within the builder’s interface. Click it to make your website public.
- WordPress: Your WordPress site is typically live as soon as it’s installed. Ensure that in your WordPress Dashboard, under Settings > Reading, the option “Discourage search engines from indexing this site” is unchecked.
- What you’ll see: A confirmation message indicating your site is now live.
Step 7: Promote and Maintain Your Website
Launching your website is just the beginning!
- Promote Your Site:
- Social Media: Share your new website link across all your social media profiles.
- Email Marketing: Send out a newsletter to your contacts announcing your launch.
- Local Directories: List your business on Google My Business and other relevant online directories.
- Ongoing SEO: Continue to create fresh, high-quality content regularly. Monitor your website’s performance using tools like Google Analytics and Google Search Console.
- Regular Backups: Hostinger typically offers automatic backups, but always be aware of how to restore your site if needed (usually found in hPanel under “Files” or “Backups”).
- Updates:
- Hostinger Website Builder: Hostinger handles all builder updates automatically.
- WordPress: Regularly update your WordPress core, themes, and plugins to ensure security and compatibility. You’ll see notifications in your WordPress dashboard.